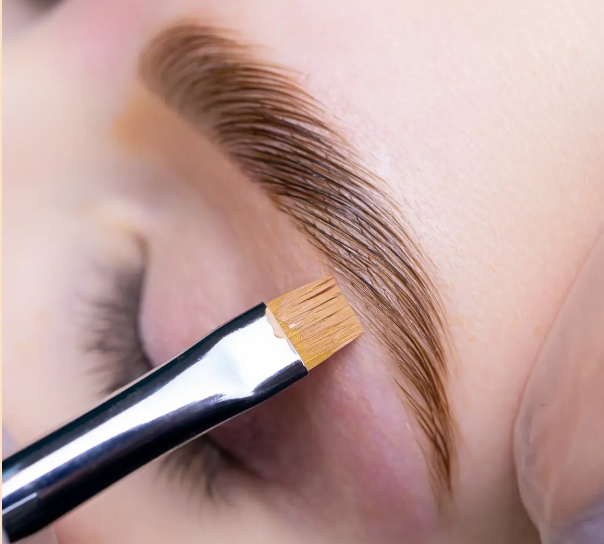
Brow lamination is becoming a top trend in the beauty world, giving you perfectly sculpted and defined brows. If you’re looking for stunning results, it’s important to follow the right brow lamination steps for a flawless finish. In this guide, we’ll walk you through the entire process, ensuring you understand every step before booking your next brow treatment. Whether you’re in North Brunswick, NJ, or nearby, mastering these steps will guarantee you achieve the perfect brows every time.
Step 1: Cleansing and Prepping the Brows
Before beginning any brow lamination, the first step is always to cleanse the area. Using a gentle, oil-free cleanser, we remove all makeup, oils, and impurities from the brows to ensure proper adhesion of the lamination solution. Prepping the brows also involves combing them into the desired shape to create a smooth base for the treatment. This preparation is key for a long-lasting result, especially if you’re in a humid area like North Brunswick, NJ. Proper cleansing is the first of the essential brow lamination steps to achieve beautiful results.
Step 2: Applying the Lifting Solution
The next step in brow lamination is applying the lifting solution. This product helps break down the bonds in your brow hair, making them more flexible and easier to mold. We make sure to coat each hair evenly, ensuring that every strand is lifted properly. Depending on the thickness of your brows, we may leave the solution on for a longer or shorter period. These brow lamination steps ensure your brows are lifted and shaped perfectly.
Step 3: Setting the Brows with a Neutralizer
Once your brows have been lifted and shaped, it’s time to set them in place. We apply a neutralizer to your brows to reform the bonds and lock them into the new shape. This step helps the lamination last longer and ensures that your brows stay in the desired position for weeks. With the high humidity in North Brunswick, NJ, this neutralizer step is especially important for keeping your brows sleek and smooth.
Step 4: Nourishing the Brows with a Hydration Serum
After the neutralizer is removed, the brows can sometimes feel a bit dry due to the lifting process. To restore moisture and keep them healthy, we apply a hydration serum that nourishes the brow hair and ensures they stay soft and shiny. This step not only gives your brows a healthy glow but also helps protect them from environmental stress, making it ideal for those living in North Brunswick, NJ and beyond.
Step 5: Shaping and Trimming the Brows
Now that the lamination process is complete, it’s time to trim and shape the brows to perfection. Using small scissors and tweezers, we carefully trim any excess hairs and define the brow shape. This final step allows us to create a clean and polished look that complements your face structure, giving you perfectly groomed brows that are on-trend.
Step 6: Applying Brow Tint (Optional)
While brow lamination provides beautiful structure, some people prefer adding a tint for even more definition. Tinting darkens the brow hairs, making them appear fuller and bolder. If you’re in North Brunswick, NJ, and love a dramatic brow look, this optional step can be added to your brow lamination service for that extra wow factor. Adding tint is not always part of the essential brow lamination steps, but it enhances the overall result.
Step 7: Post-Care and Maintenance Tips
After the lamination, we provide essential post-care instructions. Avoid wetting your brows for 24 hours to allow the lamination to set completely. It’s also recommended to avoid saunas, sweating, and heavy oils during this time to prevent disrupting the results. By following these maintenance tips, especially in a climate like North Brunswick, NJ, you can ensure your brows look their best for up to 6-8 weeks. These aftercare brow lamination steps help prolong the results of your treatment.
Step 8: Follow-Up Treatments for Long-Lasting Results
Brow lamination isn’t permanent, so regular touch-ups every 6-8 weeks will keep your brows looking fresh. If you’re in North Brunswick, NJ, it’s easy to maintain your perfect brows by scheduling follow-up treatments. Regular care ensures that your brow lamination remains on point, giving you flawless results for the long term.
FAQs
Q1: Is brow lamination safe for sensitive skin?
Yes, brow lamination is generally safe for all skin types, including sensitive skin. However, if you have any concerns, we recommend doing a patch test beforehand to ensure you don’t experience any irritation.
Q2: How long does brow lamination last?
Brow lamination typically lasts between 6-8 weeks, depending on your aftercare and skin type. Regular touch-ups help maintain the results.
Q3: Can I get brow lamination if my brows are thin?
Yes, even thin brows can benefit from lamination. The process makes your brows appear fuller and thicker by enhancing the natural direction and shape of the hair.
Q4: Do I need to tint my brows during lamination?
No, tinting is optional. While brow lamination focuses on reshaping the brows, tinting can be added for a bolder and darker look if desired.
Q5: Can I wear makeup after brow lamination?
It’s best to avoid makeup for the first 24 hours after your brow lamination to ensure the treatment sets properly. After that, you can use makeup as usual.
Achieving perfectly sculpted brows has never been easier, thanks to the step-by-step brow lamination steps we’ve covered. Whether you’re in North Brunswick, NJ, or beyond, following these steps guarantees long-lasting, stunning results. If you’re ready to transform your brows, contact Beauty Planet at (201) 509-6242 to book your next appointment!
