Roof repair is a significant viewpoint for keeping up the judgment and security of your home. Whether you’re dealing with minor spills or broad harm, knowing how to approach roof repair can save you time, cash, and potential cerebral pain. Here’s a comprehensive guide to offer assistance as you explore the process of roof repair in Fayetteville NC effectively.
1. Initial Assessment
Identify roof issues.
Leaks: Look for water stains on ceilings or walls.
Missing Shingles: Check for obvious harm or crevices in shingle coverage.
Sagging Zones: Assess for regions where the roof shows up to list or dip.
Interior Inspection
Attic Review: Check for signs of water harm, form, or sunshine coming through the roof boards.
2. Assemble vital instruments and materials.
Tools
Safety Adapt: security tackle, non-slip shoes, and gloves.
Roofing Devices: Pound, material nails, pry bar, utility cut, and material adhesive.
Materials
Replacement Shingles: Coordinate existing shingle sort, color, and texture.
Roofing Cement: For fixing splits and securing free shingles.
Underlayment: Gives an additional layer of security underneath shingles.
3. Arranging and preparation
Weather Considerations
Dry Conditions: Plan repairs amid a dry climate to avoid advanced water damage.
Temperature: Dodge extraordinary temperatures that seem to influence materials and adhesives.
Safety Precautions
Secure Step: Guarantee the step is steady and set on a level surface.
Safety Tackle: Utilize a security tackle when working on soak rooftops or heights.
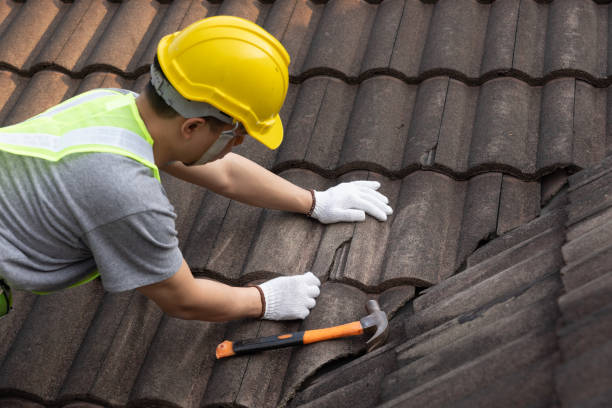
4. Repair Process
Repairing Shingles
Loose Shingles: Lift the edges and apply material cement underneath them. Press down solidly to secure.
Damaged Shingles: Expel damaged shingles using a pry bar. Slide unused shingles into the hole and secure with material nails.
Replacing Lost Shingles: Slide unused shingles into position, guaranteeing they cover adjoining shingles for legitimate coverage.
Fixing roof leaks
Locate the Spill: Follow the source of the spill from the interior the storage room or by reviewing the roof surface.
Apply Material Cement: Seal little splits or crevices with material cement. Cover the influenced zone thoroughly.
Addressing auxiliary issues
Sagging Roof: Counsel a proficient for auxiliary issues like drooping or bowing rooftops. These may require more broad repairs.
5. Last Checks and Cleanup
Inspection
Check Repairs: Guarantee all repairs are safely in place and no extra harm exists.
Interior Assessment: Confirm that there are no signs of spills or water harming the interior of the home.
Cleanup
Remove flotsam and jetsam: Clear the roof and canals of any flotsam and jetsam or extra materials.
Dispose of Materials: Legitimately arrange ancient shingles, nails, and other squander materials.
6. Follow-Up and Maintenance
Regular Maintenance
Annual Reviews: Plan customary roof assessments to capture potential issues early.
Gutter Cleaning: Keep canals clean and free of flotsam and jetsam to anticipate water reinforcement and damage.
Professional Services
Consult Specialists: For broad harm or complex repairs, consider enlisting proficient material contractors.
Warranty and Ensures: Guarantee repairs are secured beneath the guarantee and ensure peace of mind.
Conclusion
Proficient roof repair requires careful planning, arrangement, and execution to guarantee the life span and security of your home. By following this step-by-step guide and taking vital security safety measures, you can effectively address roof issues and avoid future harm. Whether you’re handling minor repairs or counseling experts for more complex issues, keeping up a well-maintained roof is key to securing your home from the components and protecting its value over time.